
How to Set Up & Connect Your POS System Quickly and Start Selling Right Away
- Teboho Daniel

- Feb 16
- 3 min read
Last updated: 16 February 2025
Congratulations on your new POS system! Setting it up correctly ensures smooth transactions, better business management, and a great customer experience. This guide will walk you through the quick and easy steps to get your POS system up and running immediately after it arrives.
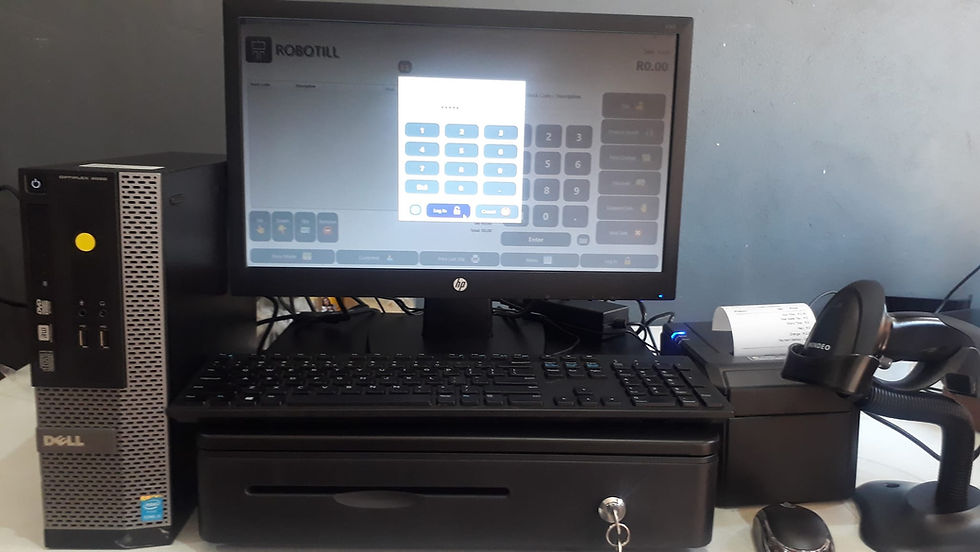
Step 1: Unbox and Inspect Your Equipment
When your POS system arrives, carefully unbox it and check for all the necessary components, which may include:
Desktop PC or Touchscreen (POS System)
POS Software (Pre-installed by TillSense technicians)
Receipt Printer
Cash Drawer
Barcode Scanner
Customer Display
Power Cables and Adapters
Network Cables (if applicable)
Software License or Activation Code
If anything is missing, contact TillSense immediately.
Step 2: Positioning and Powering Up

Place your POS hardware in the correct locations (counter, desk, or kiosk).
Plug in all devices into a power source and ensure they turn on.
Step 3: Connecting POS Hardware with ROBOTILL Software
Connecting POS Hardware
a) Receipt Printer Setup
1️⃣ Connect the printer via USB, Ethernet, or Bluetooth
2️⃣ Install the printer driver (if required).
3️⃣ Open ROBOTILL → Go to Setup → Print Settings.
4️⃣ Select the printer model and configure receipt format.
5️⃣ Print a test receipt.
3. Setting Up the POS System in ROBOTILL
Step 4: Testing the System
Process a test transaction (scan item, print receipt, open cash drawer).
Test all payment methods (cash, card, mobile payments).
Ring up a test transaction using different payment methods.
Print a receipt and verify all details are correct.
Refund the test sale if needed to check the refund process.
Ensure reports and sales data are being recorded correctly.
Step 5: Security and Backup

Create accounts for employees who will use the POS.
Assign roles and permissions (e.g., cashiers, supervisor, managers, admins).
Set up security measures like PIN codes or fingerprint login if available.
Enable automatic backups (local or cloud-based).
Install surge protectors or UPS to protect against power failures.
Step 6: Train Staff and Go Live
Provide a quick demo to your staff on how to use the system.
Show them how to process sales, handle refunds, and troubleshoot minor issues.
Once confident, start using the POS system with real customers!
By following these simple steps, your POS system will be fully operational in no time. If you run into any issues, consult the user manual or contact customer support. Now you’re ready to streamline sales and manage your business with ease!
Need to book for detailed Training? Contact TillSense.com for reliable and easy-to-use POS solutions!


Comments